|
Option 1 – Existing Database
If you have previously run the Updater, choose this option.
Note: NEM-Review v6.2.x cannot connect to a v6.1.x or v5 database. If you do not have a v6.2.x database, choose option 2.
To connect to an existing NEM-Review database on your local network, under Option 1 click browse, navigate to your database and click OK.
If access to the database is restricted, a login sreen may appear.
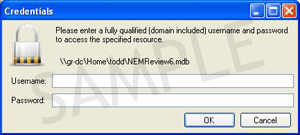
Enter your windows logon (including the domain, e.g. domain\username) and password, and click OK.
|
OR |
Option 2 – Download New Database
If you have not run the Updater before, choose this option.
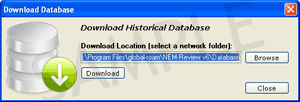
To download a new database, under Option 2 click download.
Browse to a location to save the NEM-Review database and click download.
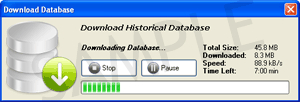
You will be informed when the download is complete. Click close to finish.

|